DIY Mitten Ornaments
- KC

- Dec 10, 2019
- 4 min read
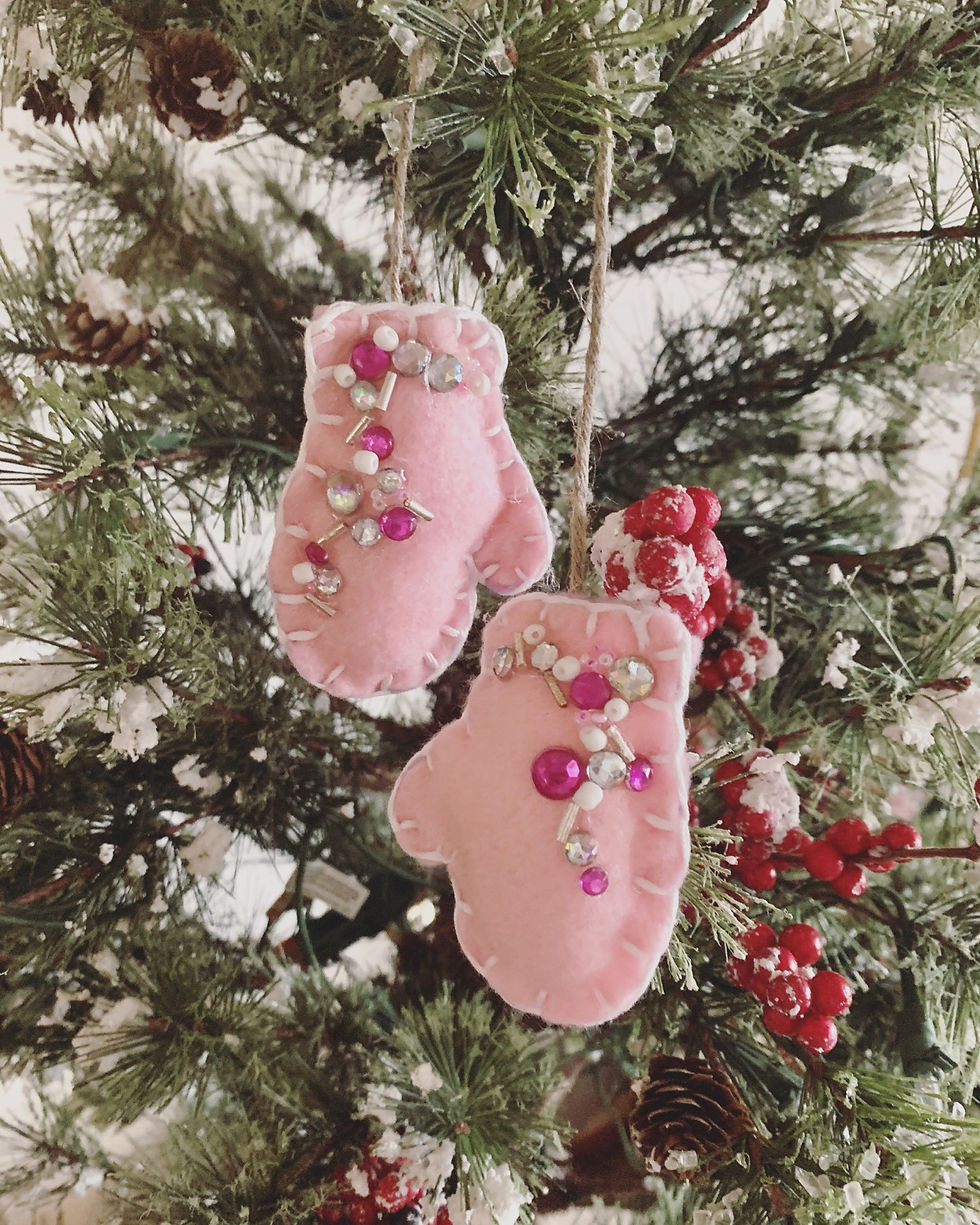
I don't know about you but I'm obsessed with the holiday season and Christmas! I have bought way too many Christmas decorations and ornaments the last few years, but ornaments are something you can never have too many of..... in my opinion haha. Last Christmas I taught myself to do some hand sewing via YouTube with felt and embroidery floss. The lovely result was felt ornaments! This year, I decided to step it up from the basics. I wanted to give my cute little mittens as gifts for family and friends. I've decided to tie them around a wine bottle so I knew who was whose. Cute right?
The materials can easily be found at any craft store or even Walmart or Target. I recommend buying the thicker, more expensive felt. The product is much nicer. I would advise the same with the embroidery floss. The cheaper kind gets more easily tangled. I used a mixture of rhinestones, beads, and sequins I had in my craft box from other projects. Sewing scissors are a MUST. They allow even and clean cuts for shapes. I chose twine to hang up my mittens! You may also use ribbon or another material if you wish! You will need a large darning needle to hand sew the felt. It needs to be thick! I found mine in the sewing section of Michaels.
Items Needed:
-Felt
-Embroidery Floss
-Beads
-Sewing Scissors
-Twine
-Large Darning Needle
-Stuffing (optional)
-Glue Gun
-Glue Sticks
Step 1: Find a mitten pattern you like online! Check Google, Pinterest, etc. I copied my straight from Google images. The image is below! I cut out this image and traced my felt with this to make my mittens! You need 4 of them, a front and a back for each side. You then need to cut them with the sewing scissors.

Step 2: Once you have the mittens cut out, you need to prepare to sew. You will need to thread your needle. I have used embroidery floss for thick stitching. I think it gives it the homemade cozy look! You can buy embroidery floss is endless colors at JoAnns, Michaels, Hobby Lobby, etc. The same with felt. You can pick endless colors. Measure the embroidery floss to be about 36 inches. Then thread it through your needle. Make sure both ends are even and tie a knot. cut the excess from the thread to the tip of the knot. Now we are ready to sew!
Step 3: Have both pieces of the mitten on together. Pick which side will be your front and back. Truthfully, sometimes the back looks better than my front, so I'll finish it on that side. You will thread through just the top layer and pull it through, The knot should be between the top and bottom mitten layers. You will put the needle in through the back and pull towards the front. It should be about 1/4 inch stitch length, you can eyeball it to your best ability. I try to start in the corner, because I think it looks best and easiest to finish there also. Then you do a second stitch through both layers. Again, put the needle in from the back in the same place you put the first knot stitch, and pull through to the front. It should wrap around the outside edge and show off the stitch. You will pull each one tight so it isn't loose. This will form a sort of a knot. We will repeat this around the entire mitten.
Step 4: Now that we are stitching the rest of the mitten, I will give some tips. You will continue to do stitch by stitch, keep your spacing even, and stitches the same length inwards also. Continue moving in one direction. I move to my left because I am left handed. If you are right handed you may want to move to the right. Try to ensure the stitches do not slant when you pull them through, it will make the mitten look messy. Again, spacing is very important to it looking neat as well. You will continue to stitch around the entire mitten. Once you get back to the beginning, you will have room for 2 stitches or so left. You need to pause once you get to this point.
Step 5: You need to stuff your mitten! I highly recommend using stuffing, I think it makes the mittens look a lot more full and pretty. They are very flat without it. You will just grab a small handful and push it into the opening with your scissors. Try to spread it around with your fingers. If you use too much, it will make your mitten look distorted. You just want to use enough to puff it up a bit.
Step 6: You will now resume stitching the last few stitches. Once you meet it back to where you started, you will need to knot it on the side you wish to use as the back. You will pick that side, you will stitch underneath another stitch creating a loop, and then pull through the loop to make a knot. I do this twice to double knot it. Then, cut off the excess thread that contains the needle.
Step 7: Lastly, the fun part!!! Decorating. I have used twine to put my mittens together, but you may use any material burlap, ribbon, etc. Hot glue guns are essential for crafting. If you don't have one, you need one. They have them at the dollar store or any craft store. I measure the length of twine I'd like to use, then glue a mitten to each end of the twine. I like to hang my mittens with one higher than the other. I let them sit for a minute or two for the glue to set. Then I pre pick my beads out to establish a color theme. Then I got glue them on and TAA DAA, we're all done.
These are perfect little gifts for Christmas, Birthdays, Baby Showers, and even fall colored ones would be cute! They are cheap and so easy once you have the materials. Most of my materials I found around the house. Even if so, you shouldn't spend more than $15.00 to buy everything. Then, you can make endless mittens or other felt projects! I've included a video as well to show you.


Comments